

Do you love trying new crafts? To be honest I think my friend Courtnay and I have crafting ADD. Either that or collecting craft supplies has become a whole separate hobby! Sometimes it takes us awhile to do actual projects but we use getting together as motivation to try out our new craft obsessions! Plus it’s just nice to spend time with good friends, and a 2nd set of hands when trying out a new hobby is never a bad thing!
So we got together over a weekend and were discussing different activities to do. We both dabble in painting, sewing, and other various crafty things. We were trying to decide what would be the most fun and when we hit resin crafts both of us got really excited! I’m pretty sure craft videos had something to do with this. We had both seen enough to be enthusiastic but neither one of us was very confident. We figured this was a great reason to try it together, at least it would be fun, right!
Going on a Nature Walk
It was so warm the day we did this project. We walked to the store to get ice cream with the kids. Everyone had such manicured lawns in this neighborhood, we needed to look really hard to find little things to fit into our resin molds.
The kids had a blast looking for tiny leaves, flowers, seeds, unusual rocks, feathers, and anything else that looked cool. Of course we collected a ton of stuff and used very little! We wanted variety though and weren’t sure what we’d use. The kids got super excited every time anyone found something interesting. Also we spotted Giant Chickens!


Then we figured out we didn’t have resin but some other mold medium but we were already committed. So off to the craft store we went, where we were promptly distracted by Halloween decorations and painting supplies. Aunt Courtnay had the genius idea of a secondary painting craft to distract the kids while we figured things out. Thank goodness because in the end we decided the resin pouring was a bit too challenging for the kiddos. Anyway they were happily painting away!

Did our resin projects turn out exactly as we hoped? Of course not, this was an experiment! Did we get some really cool keepsakes, yes we did! I’ll tell you all about what happened and what didn’t turn out as expected, but first here are some items the same or similar to what we were using.
Supplies
- Resin
- Activator
- Molds
- Acrylic Paint
- Popsicle Sticks
- Disposable Plastic Cups
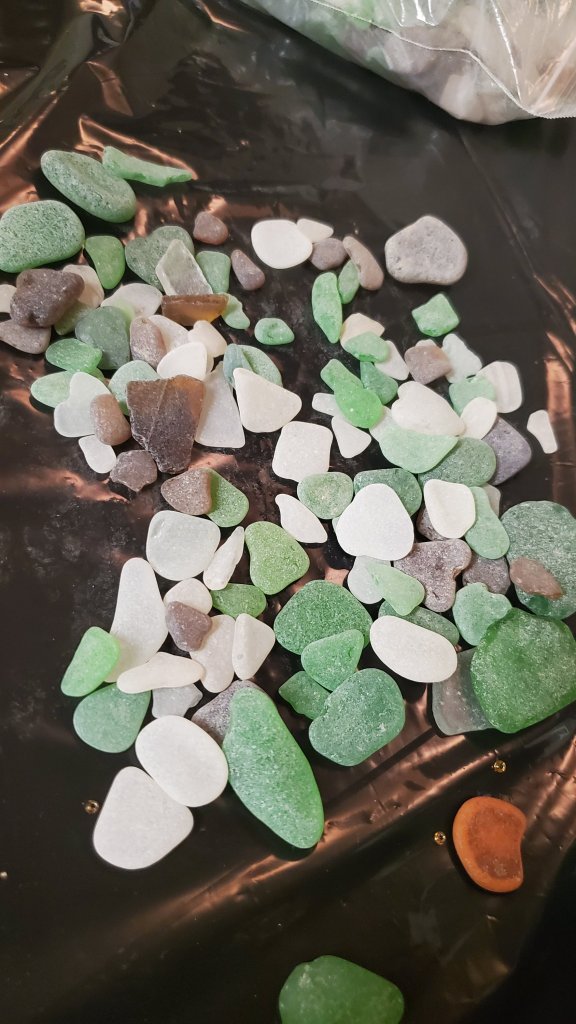
- Decorative Materials / Sparkly Things / Sea Glass / Cool Rocks
- Tweezers
- Paper Towels
- Gloves
- Heat Gun
Resin and Activator

So this is a resin similar to what we purchased. It has good reviews, and if you buy the bigger bundle your cost per ounce goes down. When you order your resin online you generally get a bigger bottle for around the same price you would pay at the craft store. Except for when resin is 20% off at Michaels like it is right now. This link did not benefit me and am including it out of the kindness of my heart. Your welcome!
Buying smaller containers of resin the 1st time is probably a good idea. Depending on the type of project the resin you pick may or may not be the best choice. I recommend getting a smaller amount and trying it for your craft.
If it works you can always purchase more later, and if it doesn’t you haven’t lost too much money. Though if you are like me you will always find something to do with the extra materials, even if they don’t work out for your intended project. (After looking at reviews and falling down a rabbit hole, I am now obsessed with resin art with fish).
Molds

This kit has a bracelet with a pattern on it like the one we used, and bonus it includes ring molds and tweezers in the kit!

I really want this kit because it has all these necklace charm molds. I love making hemp jewelry and this would work so nice for that. If you don’t like hemp jewelry adding chains or cord is easy enough and the charms with flowers, color swirls, and sparkles are just so fun! I love that you can get something with a glass-blown look without having to learn to blow glass. Yes I want to take a glass-blowing class but I haven’t made it to one yet!

These are geode shaped molds and I love the way these end up looking when you add mica and other shiny bits to your projects. Wouldn’t we all love real stone coasters but projects made with these molds are beautiful, you can match any color scheme, and I wouldn’t be as devastated if my kids broke a resin project vs breaking a real geode. One reviewer seals photographs and places them in these resin molds for photo coasters!

This set of molds comes with a pyramid shape, and a round coaster shape like some other molds we used that evening. This kit comes with a sphere, cube, and square coaster too. It’s fun to have options.
If you didn’t know these silicone molds can also be used for candles and soaps as well. Many of the molds are also food-safe before you use them but DO NOT use them for crafts and then try to use them for food!
Acrylic Paint

I like this set. It has a variety of colors that look nice together and look bright enough that should still produce a pop of color even after being diluted by the resin. Acrylic paint is also great for painting rocks, and you should have plenty of paint leftover if you are only planning to do one evening of resin crafts. Also one reviewer commented that this mixes in well with resin, which it should because craft smart makes a resin too. Good to know, thanks reviewer!
While shopping for materials I found that paints seem cheaper in the stores but it generally saves you money to order your resin online.
Decorative Materials / Sparkly Things / Sea Glass / Cool Rocks

These foil confetti butterflies would be so cute for jewelry and are can also used for nail art.

This pack of chunky glitters have a lot of variety and can be used for many different effects in your resin crafts.

This gold mica mixes in well and will give your project some sparkle! They have lots of different colors available, and you will find some beautiful resin crafts done with this product in this product’s reviews.

These crushed and tumbled flourite chips look gorgeous with gold (or silver) and the pieces are various small sizes that would be good for different kinds of resin crafts.

I could not pass up the gold nuggets either! Since I couldn’t find the tiny gold foil leaves we used in our project I wanted to add some other gold element to create a similar color scheme to what we used.

We also used gold seed beads which I liked in one project but didn’t like in another. I included photos of both projects so check them out. This is the great thing about blogs, you might learn something from my experience and save yourself some time and materials.
If you do decide to use the seed beads for resin I feel like these would work despite the not so great reviews. For beading they don’t work so well because the coating rubs off while you handle them. For resin projects you barely touch the beads so I doubt it would be a problem but note that they don’t appear as shiny in the resin as they do outside of it. It will certainly save you money to get cheaper seed beads but you might get a better result with a premium bead with a stronger coating. Anyway, something to consider.
Tweezers

If you don’t have craft tweezers it’s a good idea to pick up a pair. Tweezers with the curved tip make it easier to place decorative items into your molds. I don’t know how I would have done my bracelet any other way!
Disposable Cups

These would probably last you awhile. I feel like we only used maybe 8 cups but it’s nice to have more just in case.
Popsicles Sticks

These would also last awhile. I think we used more then 8 because we dropped one or 2 in the process. I like having popsicle sticks for gardening markers or for making kids projects, so buying extra is a good thing in my book.
Paper Towels

Don’t forget to pick up paper towels! You probably don’t need this many for the craft but hey I have no idea how clumsy you are, so maybe you do!
Gloves

We buy the venom gloves a Lowes pretty often. We look for gloves with a lot of stretch, a good fit, durability, and at a fairly inexpensive price. Apparently covid has really increased the price of gloves on Amazon. I can’t vouch for these gloves but they were the only thing I found that was similar to what we use and under $25!
Contractor Trash Bags

These bags are amazing and we use them all the time. They will fit 2 – 3 of my kitchen trash bags! This is great for when the kitchen trash bag gets over-filled and won’t make it out my front door. We will grab one of these, toss our kitchen bag in, then toss mom’s kitchen bag in, and can usually empty the rest of the trash cans around the house too. It’s definitely a time saver.
They are made from thick plastic that is good for covering surfaces while you do messy crafts. I cut the sides of the trash bags so they will cover most of my table and I re-use them multiple times depending on how messy the craft was.
Heat Gun

The heat gun is optional for popping those little bubbles and getting a clearer and smoother resin product. This heat gun has 2 heat settings which means it could be used for a variety of different projects, plus it has a convenient stand for when you set the hot gun down to cool.
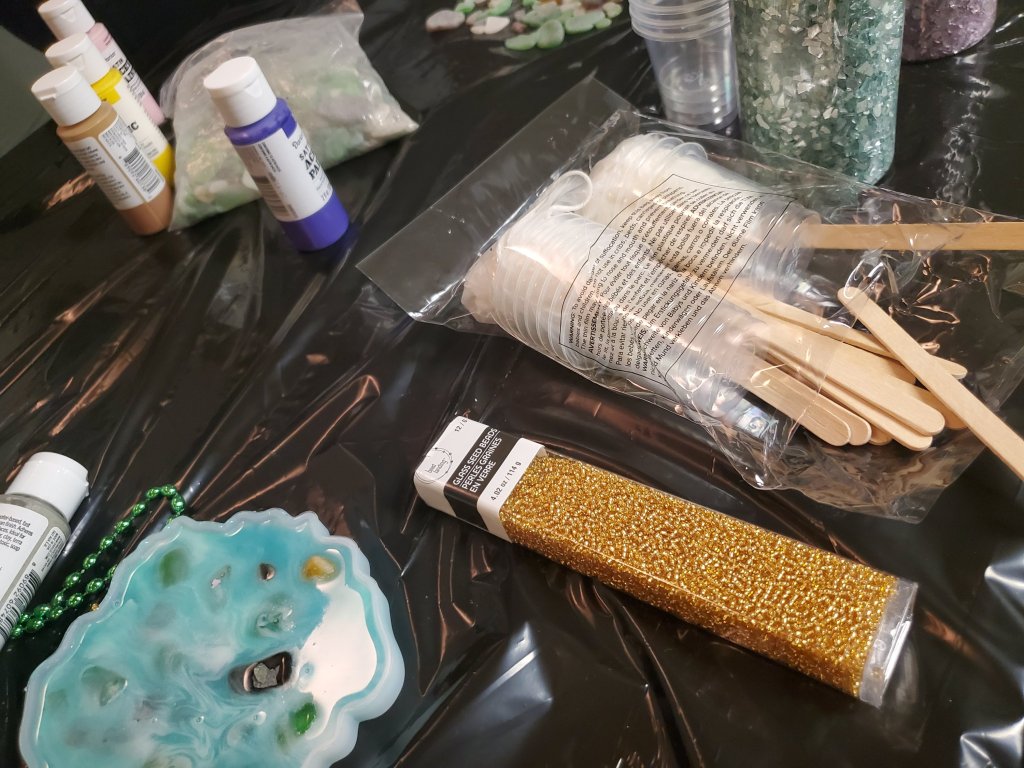
Set-Up!

Now We Are Ready to Rock!
We followed the directions on the resin and mixed it up really well. You want it very well-mixed with as little bubbles as possible.

We had several cups set out so we could add colors and additives to our resin before adding it to our molds. The Resin Obsession website talks about the many different ways there are to color your resin in case you were looking for more information or had questions that I didn’t answer.
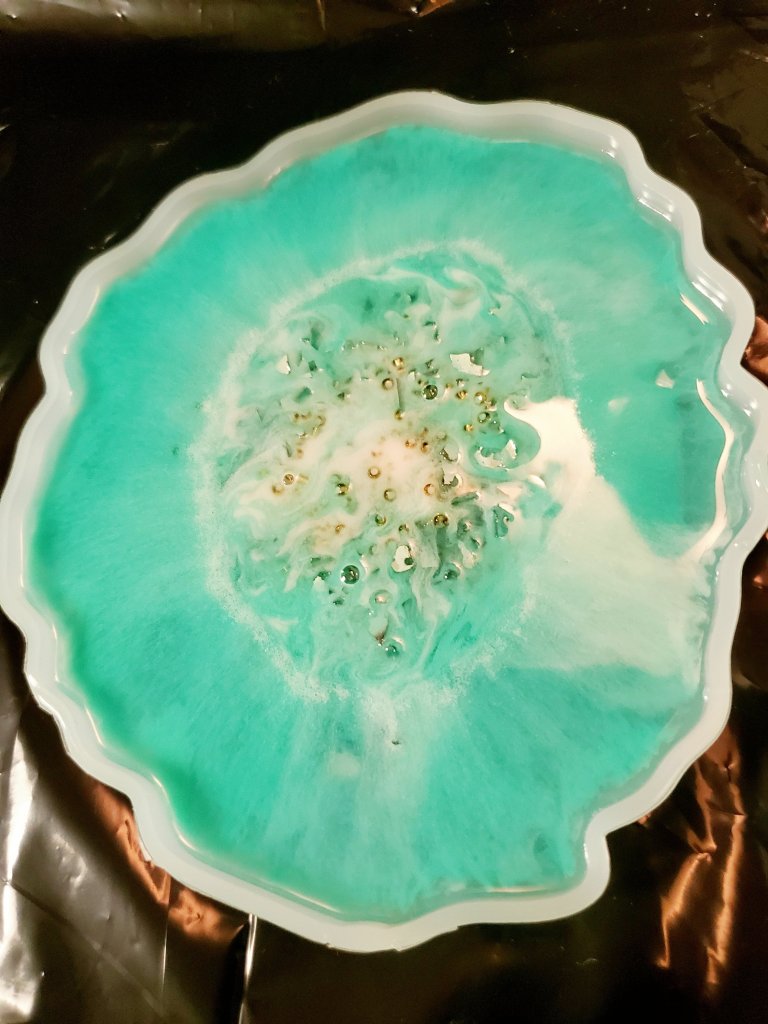
We mixed up a sea blue, a teal color, and white to use with our clear resin. Sorry I didn’t photograph every step in the process because this is a time sensitive project! We tried placing objects in the molds first and pouring on top and we also tried pouring resin and submerging objects into the resin. What worked better? Well I’m glad you asked…
There seems to be a little of both methods involved when you are pouring resin around objects. For the bigger rocks I just placed them and poured resin over them. When my mold cured and I got to check it out I wished that I had poured just a little bit of resin down before I placed my stones. I had a few places where bubbles got trapped and there was a hole in the surface of my resin.

Next issue, organic stuff floats! Oh my goodness does it ever! We had to rig up this mushroom to keep it from floating out of the resin. Unfortunately this mushroom project is probably a goner but we did learn a lot from this.

One it’s important to clean ALL the dirt off your objects first if you want your resin to be perfectly clear. Two, to resin a mushroom you would have to find a way to weight your mushroom inside of the resin. I’m thinking a bigger container, a much smaller mushroom, and a nice sized rock would have worked better and sealed in the mushroom in one process.
Note: Projects over a certain depth can turn the resin a yellowish color because of the trapped heat when curing. If you wish to maintain a crystal clear resin you may want to pour your resin in layers, letting your resin fully cure between pours.
We wanted to push the boundaries and decided to wing it and see what happened with this mushroom. Honestly I don’t think we would have been able to pour the mushroom in layers anyway, as the mushroom would have wilted during the time it took just the 1st layer of resin to cure.
Unfortunately anything organic left exposed to the air tends to shrivel pretty quickly. I had a funny little seed that didn’t get fully coated and it’s shriveling inside of my resin project. If I had gotten to it with a clear coat of nail polish within a day or so I probably could have halted or at least slowed the shriveling process but I forgot. Oh well.
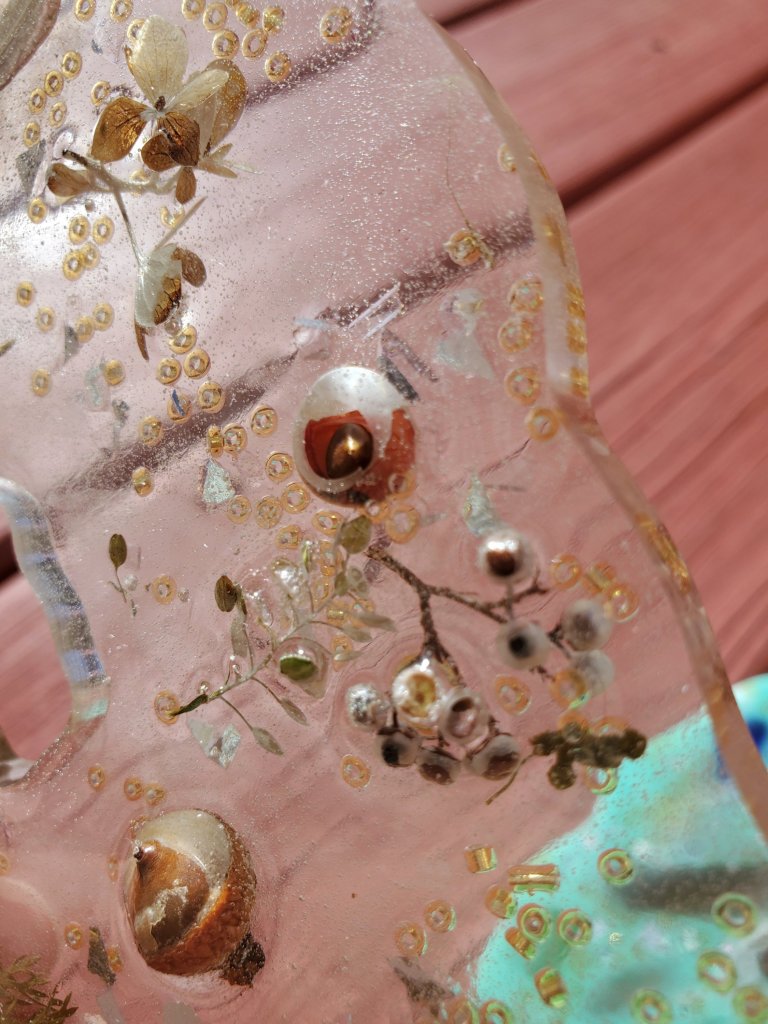
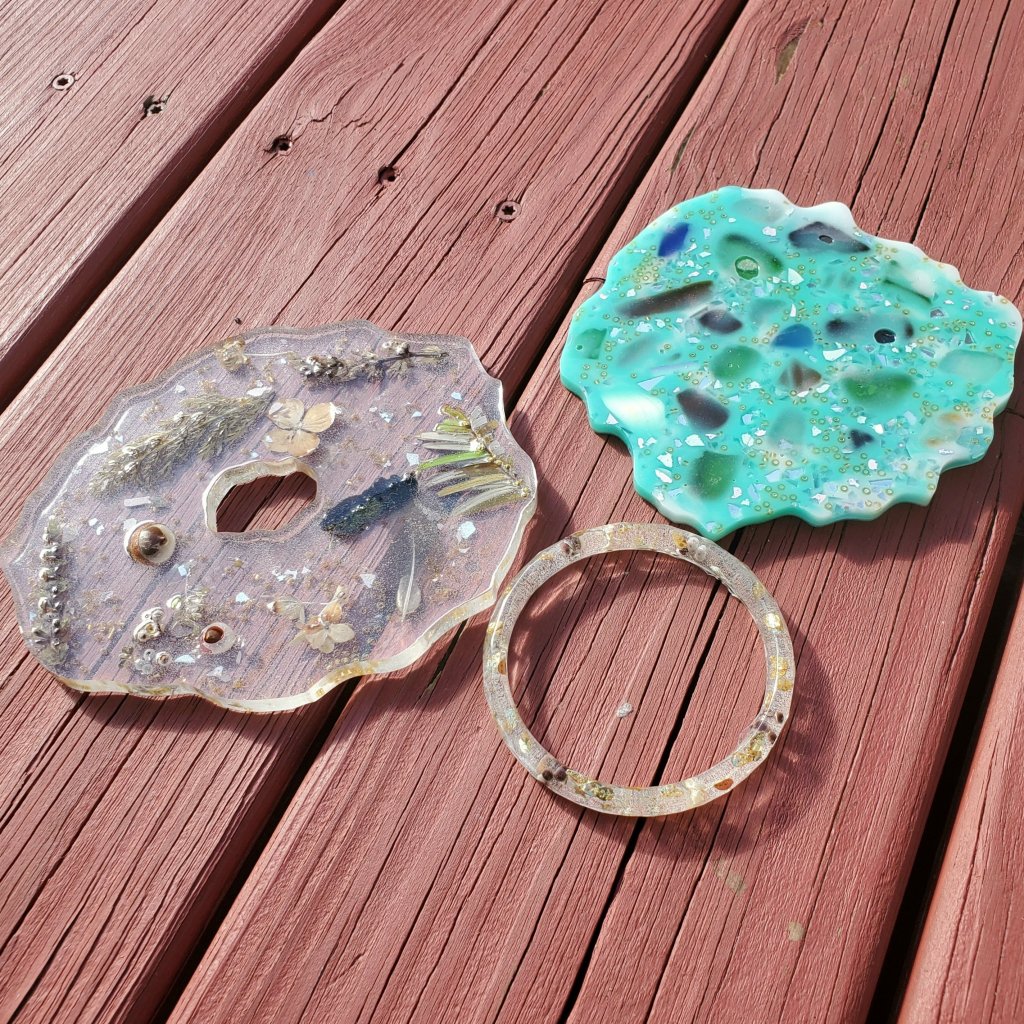
The bracelet I made had gold-leaf leaves in it and they tended to sink. Then there was the little flowers I put in and they tended to float. I feel like for this I would pour a little resin (like with my agate coaster), and then I would place some flowers before I poured in more resin. The last step would be adding some more gold-leaf elements with the tweezers, and poking your flowers back down if they try to float back up.

It’s almost assured that when you work with leafy items that some air is going to get trapped inside your project. If you keep this in mind you can adjust how you place the item to minimize how many big bubbles you trap in your project.

Obviously I did not use the heat gun on this agate shaped project. I think the tiny bubbles in this resin piece look cool but if you want a clearer result the heat gun is important. Also mix your resin well, while adding as little air as possible for the clearest results.
The heat gun is pretty fantastic for popping those tiny bubbles that rise to the top of your project too. Courtnay used the heat gun on our colored agate projects and the surface came out so smooth and beautiful. I still think I would pass on the seed beads for next time.
They didn’t provide the shine I was looking for in the project and they sort of ended up creating a weird texture. I’m not a super fan of the look of the seed beads for this project but it might be useful in some other projects, like creating a 3D texture for curly hair maybe?
Wrap Up
This was complicated and messy enough that we didn’t invite the kids to be involved in the resin pouring part of this craft. I might have them do some placing of decorative things the next time but this day we were busy reading directions, trying to figure it all out, and trouble-shooting issues we encountered along the way.
I had a blast making these resin items and it’s always better to laugh with friends when trying something new. My projects did not come out perfectly but I didn’t expect them to, especially being that we were both 1st timers. I was shocked that what we did make turned out as well as it did. I believe only the mushroom project got thrown away but I will have to check with Courtnay.
I also didn’t get pictures of her finished projects and I wish I had. She used a mica pigment in one of her “agate chips” and I would love to show you how that turned out. I can always update this and show you later! I am hopeful that this gave you enough information and confidence to get started though.
At some point in the future I would love to create a project similar to this one from Better Homes and Gardens. I have not used a polycrylic spray before but if I can use it to make organic items last longer I am super excited! I love plants and flowers and would love to bring more nature inspired beauty into my home. I love how they designed this project too because the bloom is protected and won’t collect dust, even better!
I just want to say thanks so much for reading with me today. I know plenty of you are much more experienced with these techniques than I am. If you have any tips and tricks that would save time, money, or struggle please leave it in the comments. I’d also love to see your resin crafts! Send me pictures and tag me on social. I am always looking for inspiration and love to see what people are making!
I hope everyone is having a wonderful day. Thanks again!
Kat


