Have you ever considered making your own bun cover or snood?
*Detailed Instructions Below*

Connecting During Recital Week
So last week was recital week over here! My 10 year old has been taking dance classes since she was 5 years old. This year she graduated out of the junior studio and is now a member of the senior studio! My daughter is a wild spirit in ballet and tap shoes, and she is definitely the messy ballerina.
She is a beautiful dancer but never placed a lot of effort on preparation and being “put together”. I didn’t push hard on this part of dance because she loves it, and I didn’t want to be the reason she stopped loving it. Plus we were already having chats about paying attention, not talking during class, and practicing being a good and a respectful student.
Every year we had faced the challenge of getting prepared peacefully and failed miserably, but this year was different! We reviewed instructions together, we got everything packed together. We were patient with each other, mostly. We did still have a moment but we worked it out quickly. We connected as a mom and daughter team and had fun!
It has to be said I dont know how much covid-19 played a part in our success and how much of our improvement was just us getting better at understanding each other. She is now at the tween stage, we have recently spent a ton of time together, and the “recital” was modified to honor corona virus guidelines.
I’m not sure if she is just now appreciating the makeup skills she didn’t know I had (Avon lady, helloooooo) or maybe I have just become more patient or some combination of the two.

Lol I’m pretty sure she is just at a new stage and able to appreciate, that even though I am the un-coolest, I might have some “hidden” talents. In her defense I hadn’t represented my makeup skills in the last few years. Obstacles included: sleep-deprivation, a baby, eye issues, and my endless to do list.
My routine had become moisturizer, lip product, and sometimes bronzer and eyeliner. You can see why she wouldn’t have been very impressed with my “look”. This was just the excuse we needed to inspire us to have fun with our makeup and try on some new looks.
*Blog Post Coming*
Anyway I made sure to take a ton of pictures to remember this sweet moment. I have this feeling that I am in the eye of the hurricane and that teenager-hood is going to be a real hurricane, but I do my best to ground myself in the good stuff so I have strength enough when things get tough.
To Make or Not to Make a Bun Cover
The one snag in our almost perfect year was that we could not find her “bun cover” or “snood”. So our choices were ordering it from Amazon (and praying it came in time) or I was cutting up some stretch lace and DIY-ing some bun covers.
If you have time to buy a snood or bun cover these are my favorites available on Amazon. Click the image to view the products on the Amazon website and see more details.


Doing My Research
I searched the internet for some basic instructions, in effort to avoid as many mistakes as possible. Although this may have been that unicorn moment where if I had followed my instincts I would have gotten to the finish line a little quicker.
I didn’t have any lace anything except for the little lace detail at the neckline of some camis. Thankfully my mom had a stretch lace cami (similar to this one on Amazon) she was willing to donate to the cause. You can also purchase stretch lace by the yard and make a bunch of snoods if your kid loses them as much as mine does.

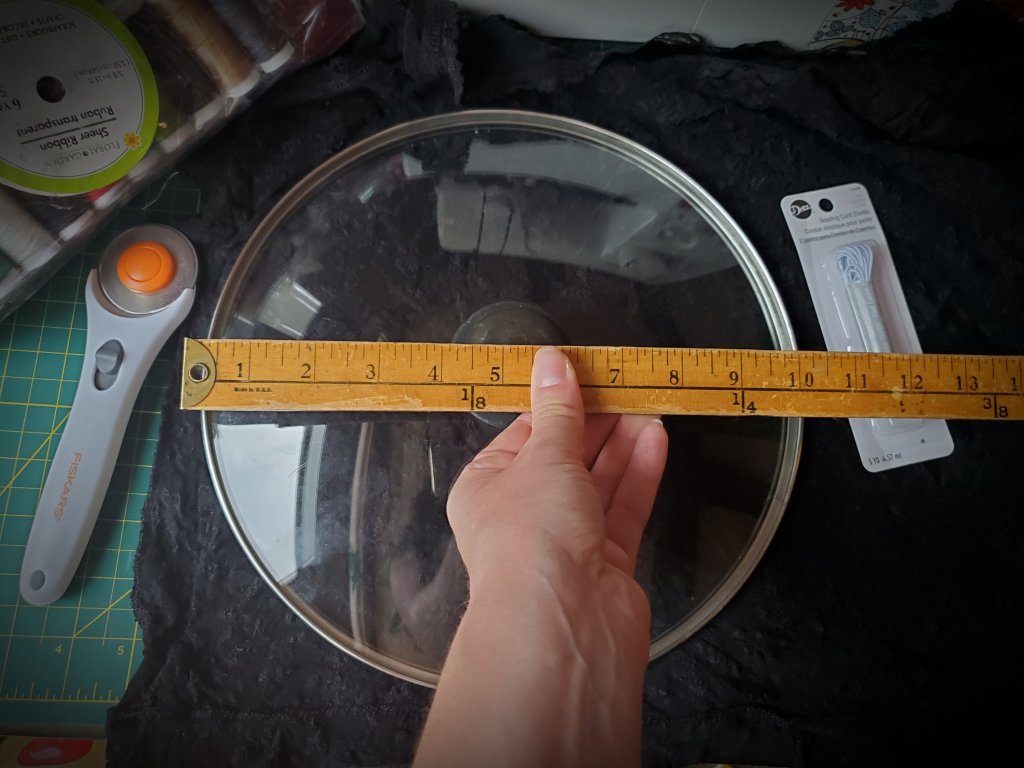
I found a tutorial and started with the information I found there. The instructions called for a 12″ diameter piece of fabric. I tried 10″ at 1st because that was the biggest pot lid I found. When I sewed up the snood it was huge! I will say that the post looked to be making a bun cover for an adult so that may account for some differences.
Another reason their tutorial may have called for such a large piece of fabric was because they were using tulle, which a lightweight net-like material that doesn’t fray.
Personally I like the lacy look better than the net look. I do still see us making some tulle snoods in the future but for now I chose to use stretch lace because I love the look and it doesn’t fray either . I was hoping using a non-fraying fabric would make this project easier and more durable.
I’m sure you could use regular lace but you would have to use fray check, or serge the edges, to prevent it from falling apart immediately. This just seems like more trouble then it’s worth so hooray for stretch lace!
Trial & Error
So to make an already too long story shorter. I cut down my 1st bun cover and made one at 5 1/2 inches in diameter. As a reward for all my hard work Billy made me a pretty pina colada with a cherry on top!


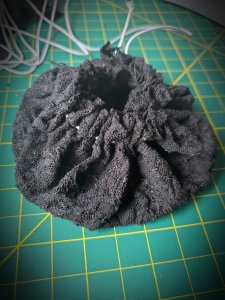


This sewed up super easy and was done in a jiffy. Here is our Odie stuffed animal wearing my daughter’s new snood on his ears! We tried the snood on her bun, and it fit well, but it looked too dark.
I wanted it to blend in more with the color of her hair. I knew that if I stretched the fabric more we would see more of her natural hair color through the lace. A side bonus of making the snood stretch more was that it made the beautiful lace pattern look even better.
Since it never hurts to have a spare of an item like this, we kept the “too big” snood and I cut a new smaller piece for our next bun cover.
Making a Bun Cover Tutorial:
Materials
- Stretch Lace Fabric (In a color that blends well with hairspray-ed hair lol)
- Beading Cord Elastic
- NeedlePoint Needles
- Ruler
- Scissors
- Circle Stencil (Pot lids, Plates, or Bowls work great for this)
Instructions
- Cut out your stretch lace fabric (cut a larger size if you aren’t sure, you can cut it down later if it’s too large)

- Trim up the edges of the fabric and make it look nice

- Thread your needle
- This is the hardest part
- I use another needle to shove the elastic through sometimes
- Be cautious and think this through because it’s not fun to stab yourself with a needle!
- You can also fray the braided cording at the end of your elastic, poke that through the needle, and then pull the elastic through the eye.
- Voila!

- Space stitches about a centemeter in length on either side of your stretch lace.
- Do a line of stitches, pull the elastic thread through, then do more stitches until you meet your elastic on the other side.

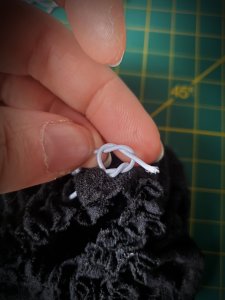
- Make sure your elastic meets on the same side of the fabric before you tie it off.

- It’s good practice to test the stretch of your elastic before you cut and tie it off.
- The bun cover elastic needs to stretch enough to be wider than the bun so it will go over it.
- I bunched up my snood to about 2 inches diameter and tied off my elastic with a square knot.

- I trimmed the elastic ends and flipped the snood outside in, so that my tie was hidden on the inside of the snood.

Voila! A ballerina bun cover, or several, for the price of a little beading cord elastic.
Ending Thoughts
If you do have to buy all the supplies, it might just be cheaper to order from Amazon. Making ours was less expensive since I had most of the supplies on-hand. It also gave me piece of mind knowing I would have our bun cover in time for the recital.
No one needs more stress during recital week! Keeping it all together and on schedule can be a major challenge but it is worth it when you see everyone come together to perform!
Please let me know if you try this project, and feel free to tag me on any of my CraftingGlow social media pages. As always, I appreciate if you share my blog posts on pinterest!
If you have any trouble when trying this project, leave it in the comments or send me a message. I’ll will do my very best to talk you through any issues. In any case I love to support others and cheer people on as they learn new skills!
Thanks for spending time with me today. I hope that you were able to find something helpful in this post. My wish is that you and yours are happy and healthy, that you find joy in dancing, and that your heart fills as you watch your dancers grow in skill and spirit.
Many blessing to you and yours.
Take care,
Kat @CraftingGlow